User Access Token
¶ Overview
Uber APIs support the OAuth 2.0 authentication and authorization mechanisms to gain access to respective APIs.
¶ User Access Token authentication
The Uber API uses OAuth 2.0 to allow developers to get a user access token to access a single user’s data. OAuth 2.0 is a specification outlined in RFC 6749 that allows third-party services to make requests on behalf of a user without accessing passwords and other sensitive information. If you are unfamiliar with OAuth 2.0, check out Aaron Parecki’s “OAuth 2 Simplified” guide.
OAuth 2.0 endpoints
| Authorization Host | https://auth.uber.com |
|---|---|
| Authorization Endpoint | https://auth.uber.com/oauth/v2/authorize |
| Token Endpoint | https://auth.uber.com/oauth/v2/token |
| Certs Endpoint | https://auth.uber.com/oauth/v2/certs * |
¶ Setup
To initially set your application up, follow these two guides which will show how can you configure your application and test accordingly.
¶ Step 1: Authorize
First, the user has to grant your app permission to access their data or do actions on their behalf. Uber provides an authorization page where users can securely sign in with their Uber username and password to grant permissions to your app. This authorization page is accessed through the authorization URL. To ensure that the user grants permission to your app properly, supply query parameters to that URL as described below.
https://auth.uber.com/oauth/v2/authorize?client_id=<CLIENT_ID>&response_type=code&redirect_uri=<REDIRECT_URI>
| Parameter | Description |
|---|---|
response_type |
OAuth 2.0 response type. Your application can use code |
client_id |
The client ID of your application. |
scope |
Space delimited list of grant scopes you would like to have permission to access on behalf of the user. Check out Scopes to see the valid subset of scopes for the Auth APIs. If none is provided the default is the set selected in your application’s dashboard. It is invalid to provide no scopes and have none selected in the dashboard. |
redirect_uri |
The URI we will redirect back to after an authorization response from the user. The base of the URI must match the redirect_uri used during the registration of your application. If none is provided the default is the first redirect URI provided in the dashboard. |
state (optional) |
State which will be passed back to you to prevent tampering. |
refer to the User ID Token guide to request the user’s Uber ID token when sending scope=openid.
After you’ve supplied the needed parameters, present this authorization URL as a link for the user to visit. Usually, this link will say “Sign in with Uber”.
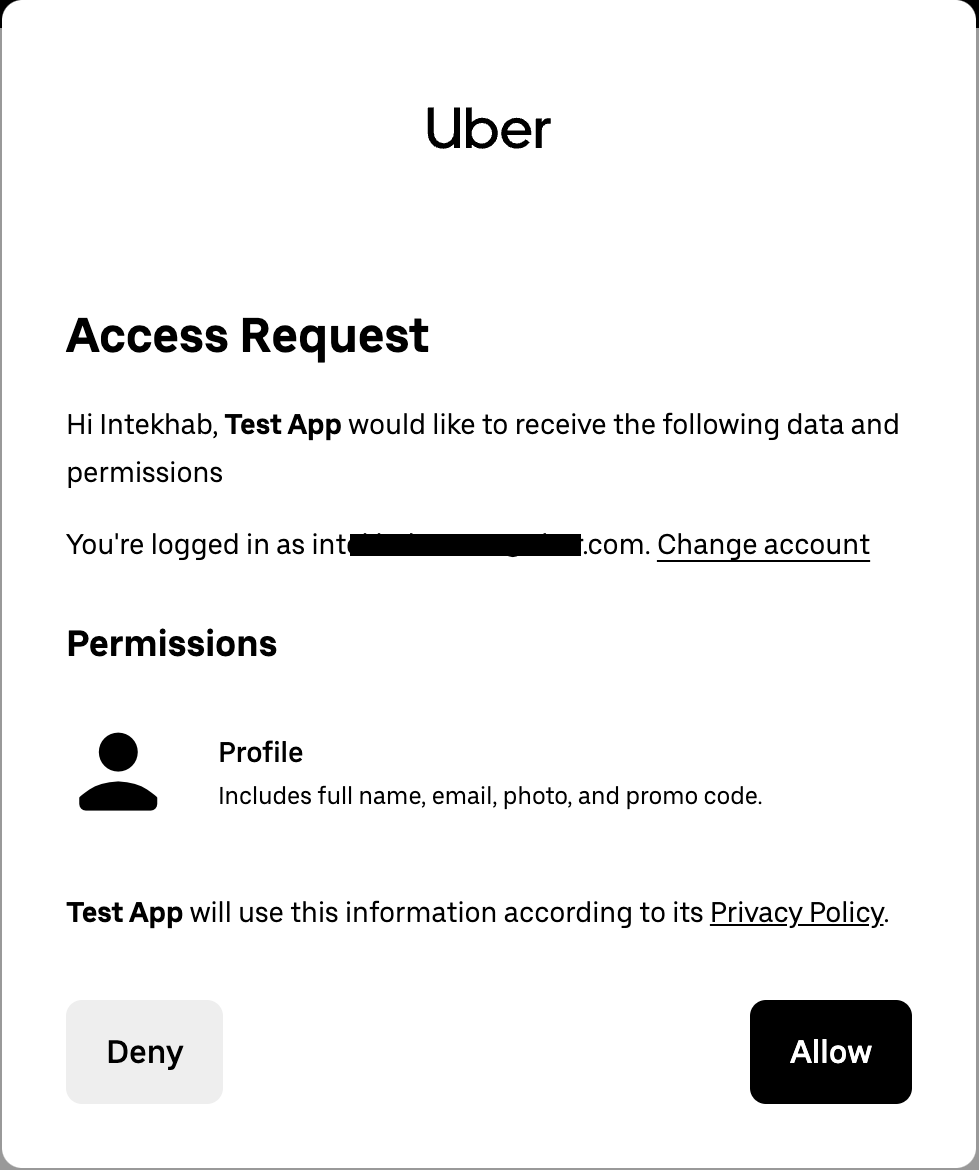
When users visit the authorization page and sign in, they will see a page that looks like this, asking them to authorize your app with the scopes you provided above.

¶ Step 2: Receive redirect
Once the user authenticates and authorizes your app, Uber will issue an HTTP 302 redirect to the redirect_uri passed in or the default when none is explicitly provided. On that redirect, you will receive a single-use authorization code which expires in 10 minutes.
GET https://your-redirect-uri/?code=AUTHORIZATION_CODE
If the user hits the Deny button, the answer will return the 403 status code with the following being returned to the Redirect URI
GET https://your-redirect-uri/?error=access_denied&description=User%20denied%20consent
¶ Step 3: Get an access token
Use the Token Endpoint to exchange this authorization code for an access_token which will allow you to make requests on behalf of the user.
Example Request:
curl -F 'client_secret=<CLIENT_SECRET>' \
     -F 'client_id=<CLIENT_ID>' \
     -F 'grant_type=authorization_code' \
     -F 'redirect_uri=<REDIRECT_URI>' \
     -F 'code=AUTHORIZATION_CODE_FROM_STEP_2' \
     https://auth.uber.com/oauth/v2/token
Example Response:
{
    "access_token": "<TOKEN>",
    "expires_in": 2592000,
    "token_type": "Bearer",
    "refresh_token": "REFRESH_TOKEN",
    "scope": "profile partner.accounts partner.payments partner.trips"
}
The access_token is valid for the time described by expires_in (in seconds). The refresh_token expires after one year and can be used to obtain a new access_token at any time given that your application is still authorized to access the API on behalf of this user.
¶ Step 4: Use bearer token
Pass the access_token returned in the previous step as a bearer token in the Authorization header.
OAuth token (sent in a header)
curl -H 'Authorization: Bearer <TOKEN>' 'https://api.uber.com/v3/me'
¶ Refreshing tokens
When the user’s access_token has expired, obtain a new access_token by exchanging the refresh_token associated with the access_token. Note: The client ID must match the client ID from the authorization code flow.
curl -F 'client_secret=<CLIENT_SECRET>' \
     -F 'client_id=<CLIENT_ID>' \
     -F 'grant_type=refresh_token' \
     -F 'refresh_token=REFRESH_TOKEN' \
     https://auth.uber.com/oauth/v2/token
¶ Revoking tokens
There are two ways that a user access token can be revoked: either you revoke it yourself upon the user’s request, or the user can go to the Data Access page (Manage Account > Privacy & Data) and click your app under Third-party apps with account access and then click Remove Access.
Within your app’s interface, you may present the user an option of “disconnecting” their Uber account from your app. Use the revoke endpoint to invalidate a user access token:
curl -F 'client_secret=<CLIENT_SECRET>' \
     -F 'client_id=<CLIENT_ID>' \
     -F 'token=<TOKEN>' \
     https://auth.uber.com/oauth/revoke
¶ Debugging & authentication errors
| Error | Description |
|---|---|
access_denied |
User denied consent |
invalid_request |
Required parameters were not provided. |
invalid_client |
The client ID or secret provided is invalid. |
invalid_grant |
Valid grant types are authorization_code and refresh_token |
invalid_scope |
The scope parameter provided is not a valid subset of scopes. |
server_error |
The server returned an unknown error. |
temporarily_unavailable |
The endpoint is temporarily unable to respond. |